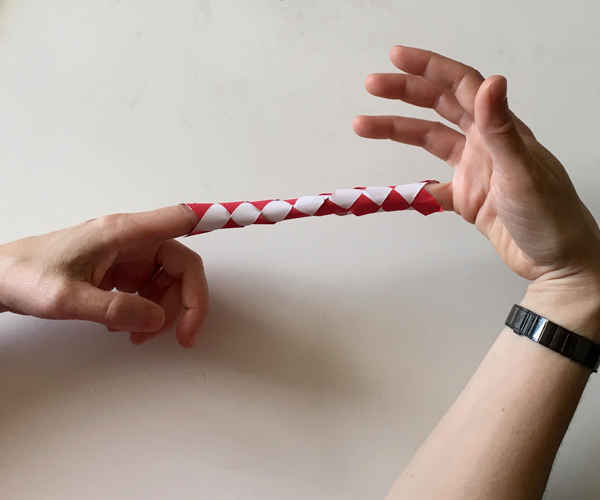
The Chinese finger trap is traditionally made of bamboo, but this amusing toy can be easily crafted from an ordinary sheet of paper. Put your finger in this pretty paper tube and then try to pull it off. The harder you pull, the tighter the weave becomes. You’re trapped! Even the Star Trek character Data was ensnared by this ancient toy. To escape, all you need is a soft touch. Push it gently off your finger, rather than yanking on the other end, and it slips right off.
This traditional toy is also very quick and easy to make! You can download free, printable instructions buy clicking on the button below, or scroll down for online instructions.
Support Make Anything Pop-Up by naming your price, or download printable PDF instructions on how to make a Chinese finger trap for free.
How to make a Chinese Finger Trap
Materials:
- Standard sized paper (letter or A4) in contrasting colors if desired.
- Glue
- A wooden dowel, rod, or pencil which is just a little narrower than your finger. You can also roll a sheet of paper and tape it to create a stiff form of a suitable width.
Tools:
- Ruler
- Thumbtacks or tape
- Scissors or skalpel knife and cutting mat
Steps:
- Cut 4 strips of paper, 1/2” wide (or 13mm) along the long edge of your sheet of paper.
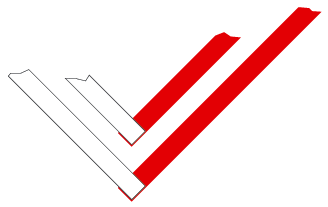
- Make two L shaped pieces by gluing two strips together at a 90° angle.
 3.
3.
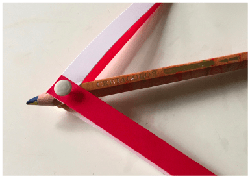
Temporarily attach the L shaped strips of paper to the opposite sides of your dowel using thumbtacks or removable tape.
4. Weave the strips together as shown below, tightening them lightly around your form as you go.

5. When you have woven the finger trap to the desired length (about 5 1/2” or 14cm), glue the strips together, on two opposite sides, where they overlap.
6. Remove woven paper from the form, and cut off the excess paper strips.
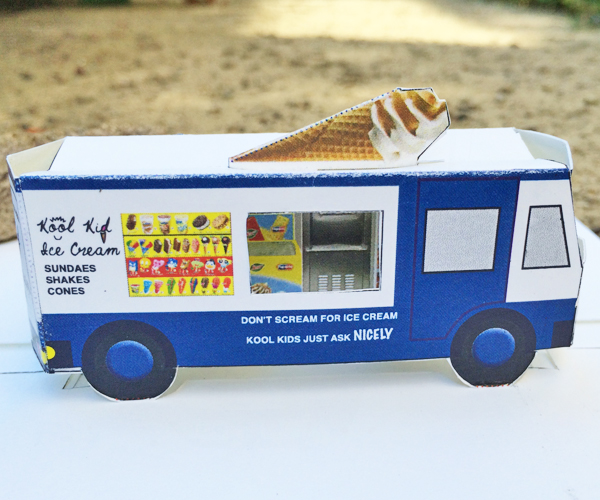
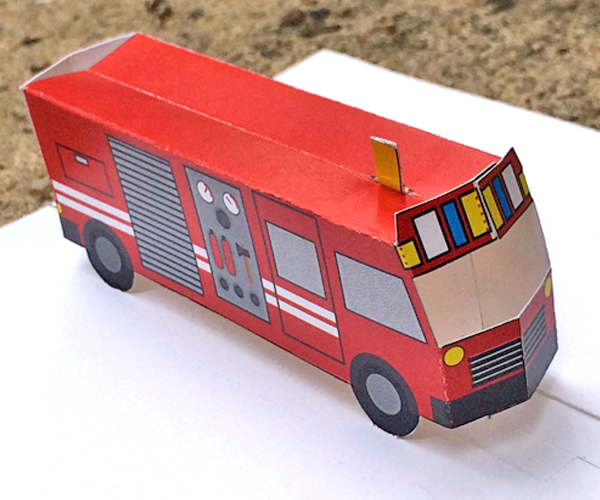
Inspired by stifling temperatures, I just posted a new design for a pop-up ice cream truck.
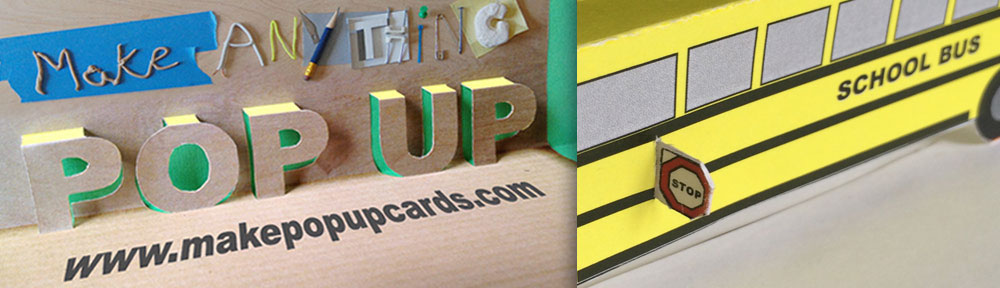
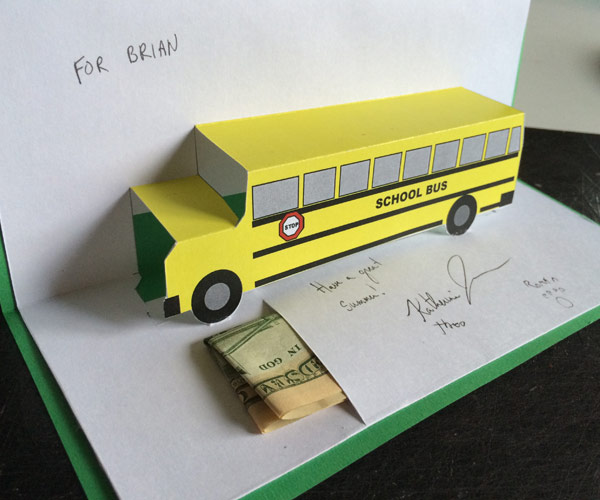
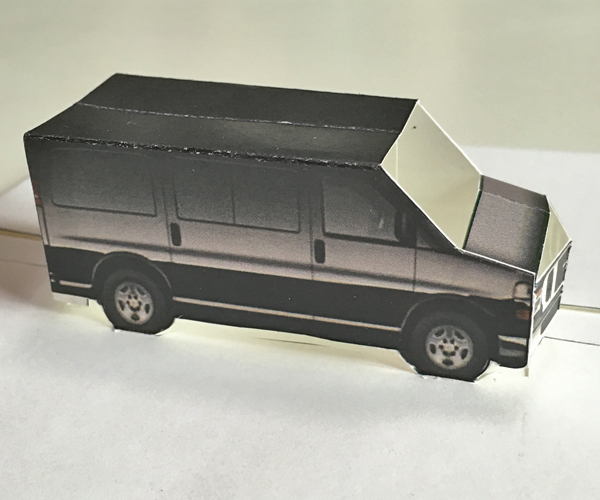
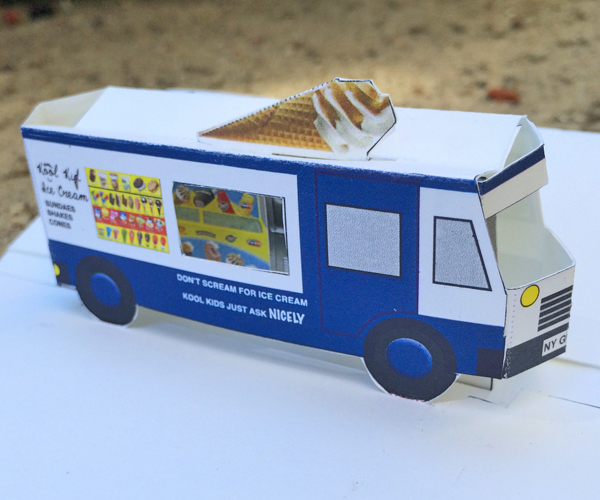 This is the third in a series of 3D foldable vehicles which I designed to be printed from a single sheet of paper (following the school bus and fire truck, and which can be used either as pop-up greeting cards or as paper toys. Or as a name tag to decorate the table for a party. Or as a goodie bag (or stocking) stuffer. I have more cars & trucks and things that float (& fly!) in the pipeline, but I thought it was time to add a new search category, named in honor of the Richard Scarry books I used to read (over & over & over) to my sons.
Cars & Trucks & Things That Float
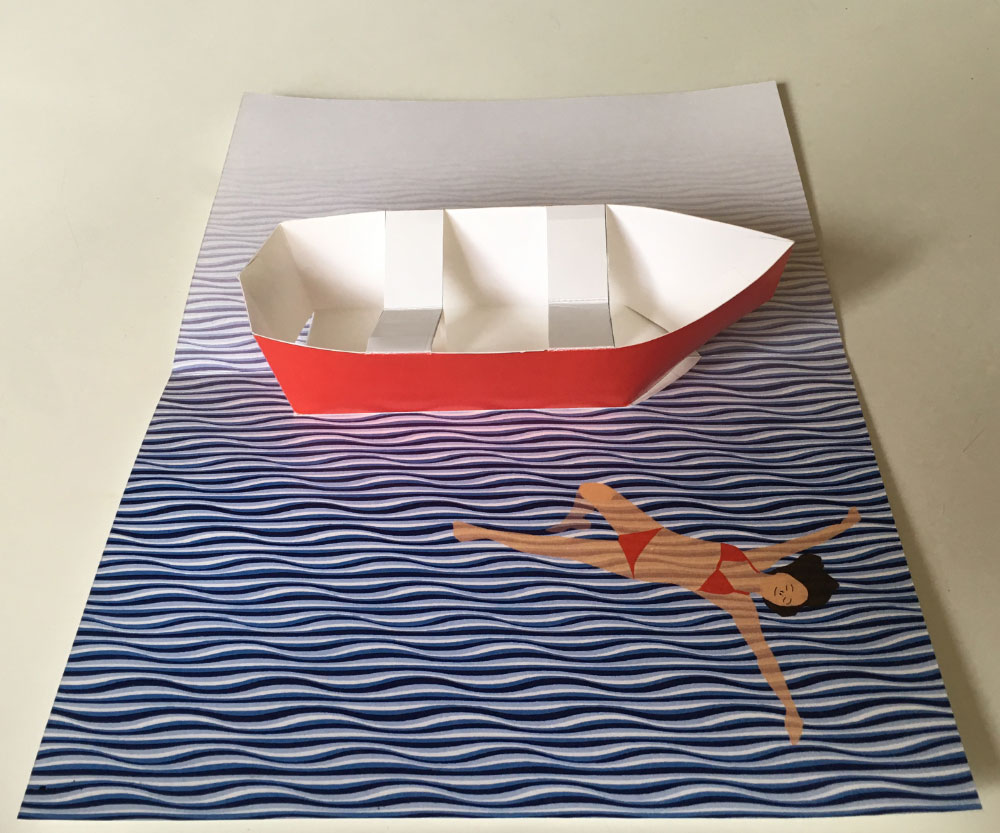
In addition to the 3D cards and toys, I have also included a few classical OA style pop-ups of things that float.

0 downloads
select options
You can also check out the general paper toy category for a wider selection of projects.
You don’t need fancy equipment to make paper craft and pop-up cards, but using the right tools WILL make a difference. Here are the tools and materials I recommend: a good self-healing cutting board, a scalpel knife with sharp blades, and a scoring tool will give you clean results and an enjoyable experience.
Basic Tools and Materials


is definitely a worthwhile investment.


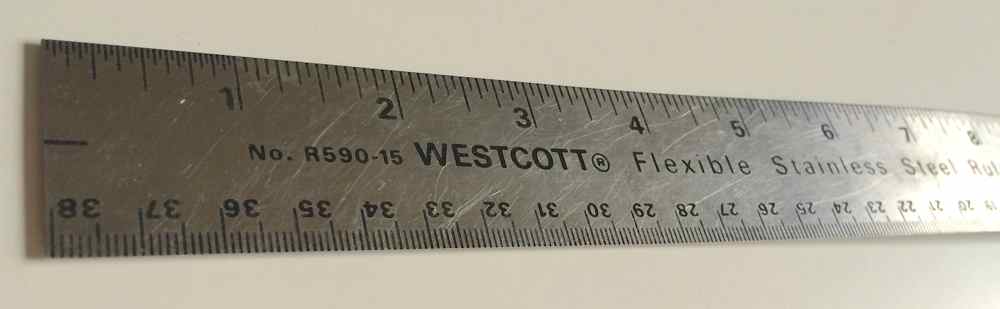
You will need a stainless steel ruler with non slip cork base, rather than a regular plastic ruler, which is too easily dented and nicked and slips while you’re trying to use it.
Tools and materials for mechanical pop-up cards

You will also need an eyelet setter.


are a great alternative to the eyelets above. I recommend using a 1/16 Inch Circle Hand Punch rather than attempting to poke a hole in the correct spot. Precision matters!

Paper


is usually used, (as the name indicates) for making old-fashioned silhouettes, but this thin, strong paper with white on one side and black on the other can also be used for making striking pop-up cards. This is best suited for the more intricate pop-ups with small detail, such as the Village Square or the Statue of Liberty. Since it is so thin it is particularly sensitive to the moisture in glue, so apply it VERY sparingly or use rubber cement.

Books and tutorials
To learn more about making pop-up cards, read my online tutorial, or check out this collection of books.
Thank you
When you purchase books or equipment by using these links to Amazon, Make Anything Pop Up may receive a commission, even though the price you pay is the same. Thanks to your support, this website can remain ad-free. Thank you!
Besides all my templates I wrote a tutorial on how to design your own pop-ups — but sometimes it’s nice to hold a volume in your hands. Here is a list of some of the books which have inspired me, books I hope you will enjoy too.


Two completely new, and completely novel designs are now ready for you to download.
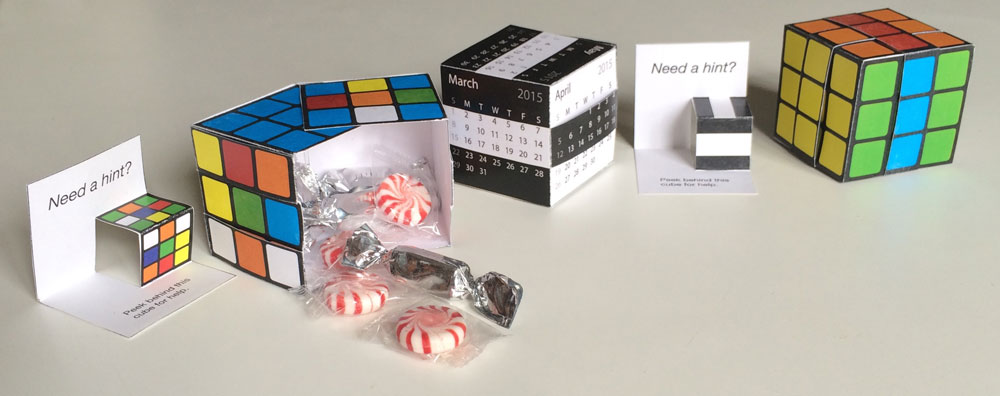
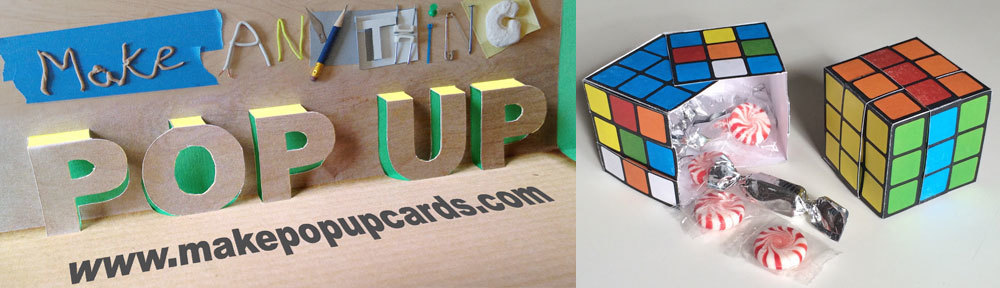
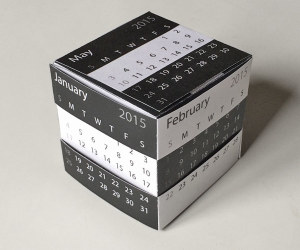
I recently posted the template and a video tutorial for a 2015 desktop calendar. It is a cube with 6 faces, and on each surface there is one month — yet the cube displays all 12 months! You can watch it in action in this video, but the only way to REALLY understand it is to make it — and even then it can be hard to grasp! But it IS easy to make….
This is a completely unique box design (which I am in the process of patenting) and it has many possible applications. Beside the calendar, it also makes an awesome Rubik’s cube. Besides a toy, it can be a gift box (it comes with a matching pop-up gift label!). Or it can be swag. You will be able to customize it with your name or logo and mail it to your favorite customers, fill it with sugared almonds and give it to all your guests at your wedding. Or just get a ten-pack and hand it out as a birthday party “goodie-box”
For now, only the downloads are available but I have also designed a slightly different version for mass production. It will look the same from the outside, but will not require any cutting or gluing to put together. Production will be financed with a Kickstarter campaign, so stay tuned for that announcement!
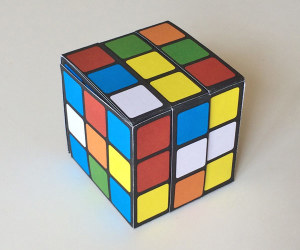
Rubik’s Cube® used by permission of Rubik’s Brand Ltd www.rubiks.com
This October newsletter is full of Halloween ideas, new designs and videos. Send a card with a spooky pop-up cat, make a mask using a very simple template, check out my instructable with tips for making costumes, or just watch the new videos I’ve posted.
There are many types of pop-ups, but to keep things from getting too complicated and long, in this tutorial I will only discuss the style known as OA (for Origamic Architecture), and limit myself to cards which are best viewed when they are opened at a 90° angle.
Would-be paper engineers have many craft book options to choose from, and though I have a few of them in my library, I find it much more helpful to learn by making — so my first piece of advice is to download a few of my pop-up cards, make them, and then come back to read the rest of this tutorial. I recommend starting with some of these pop-ups, many of which are free.
Cuts and Folds
 When making a pop-up card all folds must be straight lines.
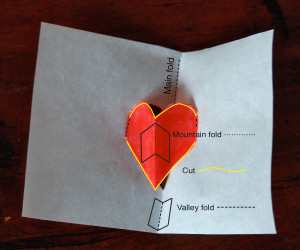
Mountain folds look like the top of a mountain, and valley folds look like the bottom of a V — like a valley.
Cuts don’t need to be straight lines, but they must go from valley fold, across a mountain top, to the next valley fold.
Basic Shape #1: the rectangle
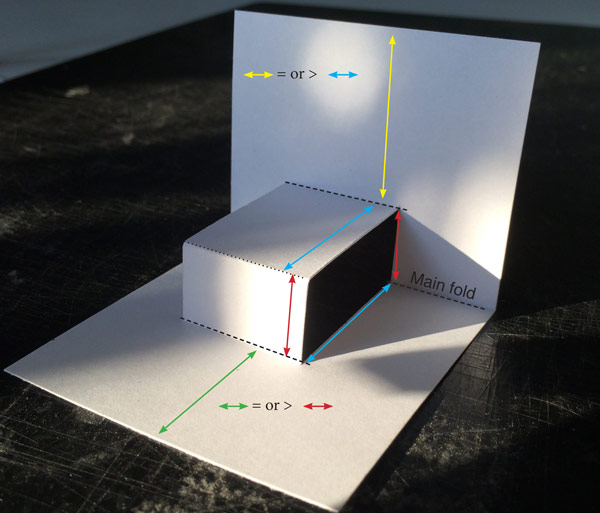
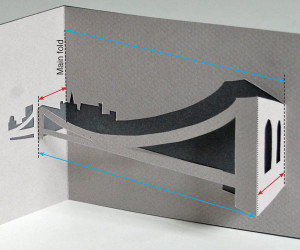
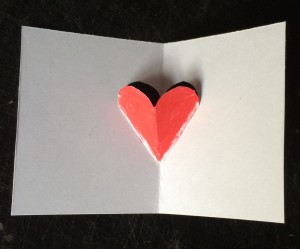
I call this shape a rectangle, but the end result can look like anything: the Brooklyn Bridge, a table or a chair. The heart pictured above is also based on the rectangle shape.
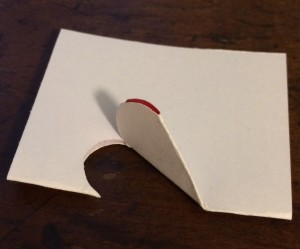
What characterizes the rectangle pop-up is that all the fold lines are parallel. When the card is opened at a 90° angle, the empty shape, when the card is viewed from the side, forms a rectangle (if it forms a square then that pop-up is symmetrical; you can fold it first, then cut over the fold with a pair of scissors).
 In addition to the photos you can download a 2D sketch which might help you visualize how to draw your own shape.
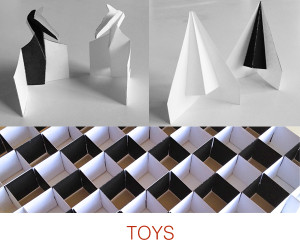
Basic shape #2 The Triangle
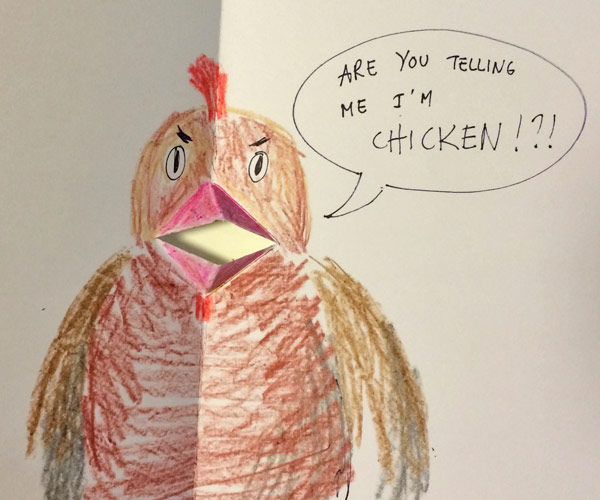
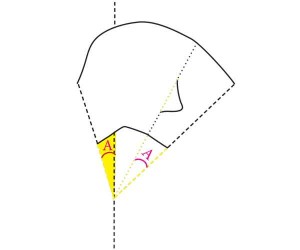
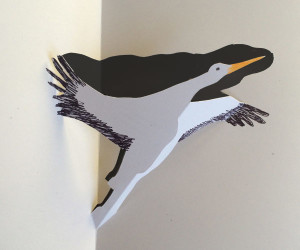
Triangles can be super easy, especially when they are symmetrical like the classic beak above or the heart on the right, but you can also design them so they slant to the side, like the dove pictured below.
To make a symmetrical triangle you can just fold a piece of paper in half, cut a single slit from the fold, then fold the your shape at any angle, as shown in the second heart photograph. If you’re drawing it, just make the tip converge with the main fold, and draw identical angles on either side of the main fold. (I don’t have a template available for the heart since I just cut that one freehand — and so can you!)

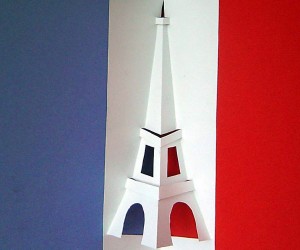
The Eiffel Tower is an example of symmetrical triangles drawn with different angles. You can watch me make it here.
Below are two sketches which show how the asymmetrical triangle pop-ups work — it’s much easier to understand those visually rather than with words.
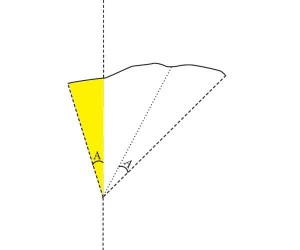
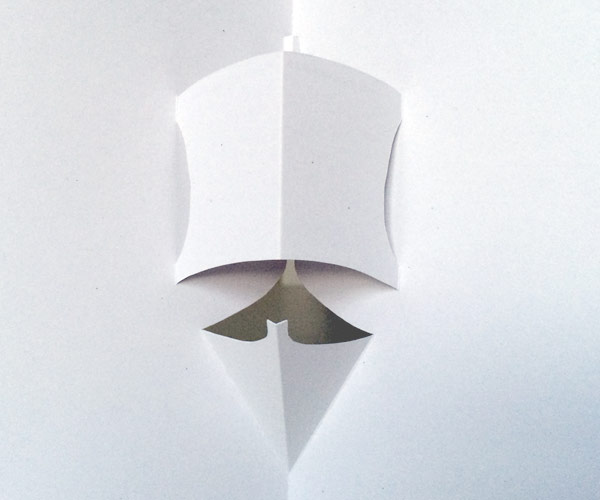
A big advantage of the triangle is that it gives extra dynamism to your pop-up as you open and close the card: look at the animated photo, below. The face with the flower could easily have been made as a silhouette with a rectangle pop-up, but since it is drawn with a triangle, as you close the card the face leans down towards the flower. Open it, and the face pulls away!
Watch out though, once you move beyond the classic bird beak and try to combine triangles on different planes they can get complicated fast, but as long as you keep your design simple triangles are easy and fun to make.
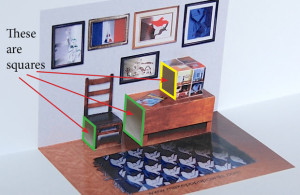
Combining shapes

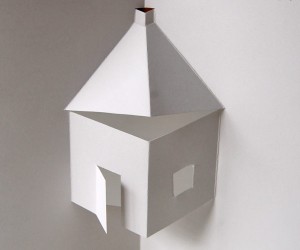
Just by using and combining triangles and rectangles you can obtain an astonishing variety of shapes: the house shows a square combined with a triangle roof, and the ship is almost identical, just upside down. The martini glass is made of a square stem with two symmetrical triangles forming the base and the glass.

When you design any card you’ll be making several drafts, trying out shapes and then adjusting them. To make the Phoenician ship below, for example, in my first draft I adjusted the shape of my standard ship hull (adjusting the bow) then added the characteristic Phoenician square sail — but it looked too chunky, so I re-drew the sail cut lines to make it look like the wind was blowing and puffing it out.
Make a 3D sketch
When I start a new design, first I imagine the shape in my head, then I draw a very rough sketch with paper and pencil and cut it out. I use that pop-up sketch as a guide to draw the cut and fold lines on my computer, then, depending on the situation, I add photos to the design. Sometimes I’ll use photos to trace the cut lines, but those shapes always need to be modified so they will fit my cut and fold lines.
Don’t start a card with the graphics, always start by drawing your cut and fold lines! You can adjust your cut and fold lines to your images later, but you will waste a lot of time and ink if you start out with the graphics. First get the pop-up to work, then decorate.
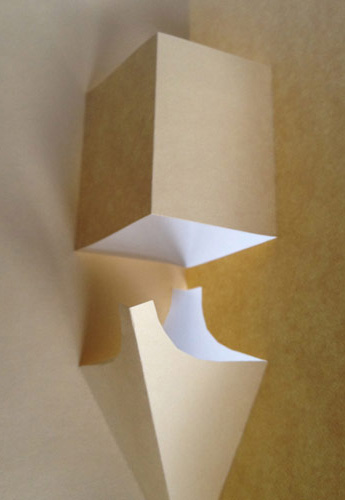
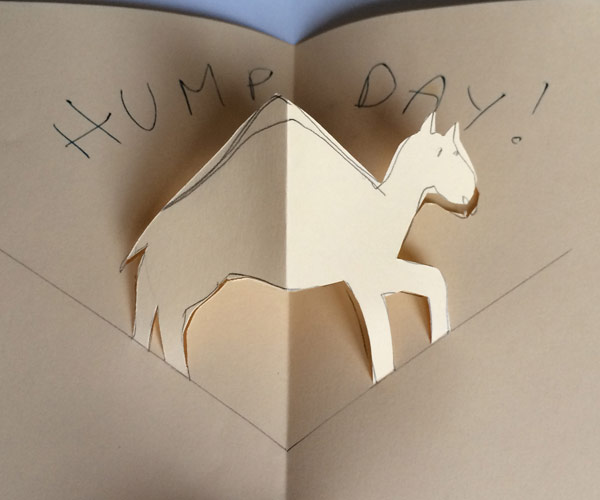
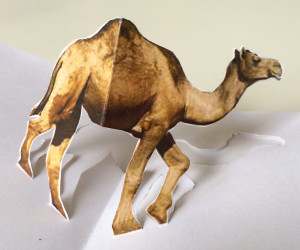
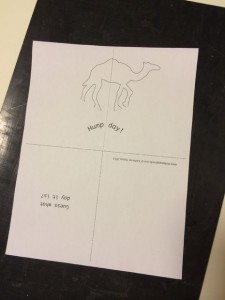
Side note: this camel card is a bit of a hybrid. To make the camel stand up the card is opened at more than 90 degrees, but less than 180 degrees (if opened all the way, the camel lies flat, but at 90 degrees it doesn’t look great either). I designed it this way intentionally to make the card simple and quick to make. No need to fuss with tabs or gluing.
To see this card being made watch the video tutorial.
Irregular shapes
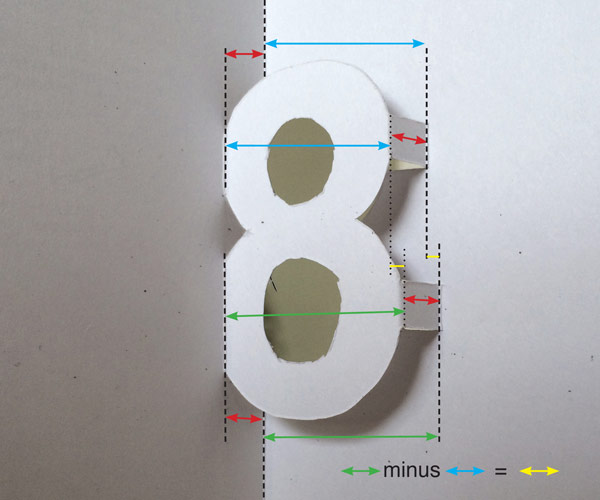
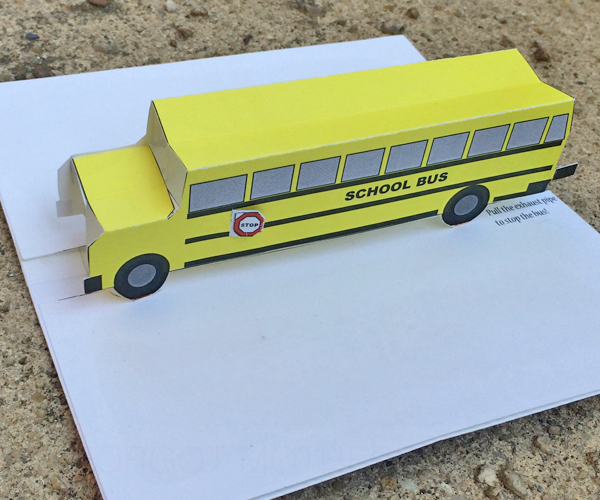
Sometimes a rectangle shape will have one part extend a little farther — for example, in this figure 8, the lower O is wider than the top 0. On the school bus the roof is higher than the front — besides these variations, theses designs are all basically simple rectangular pop-ups.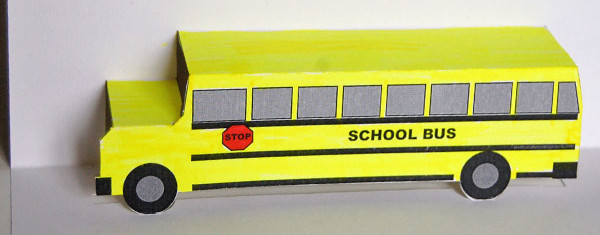
One Step at a Time
Start simple, then add layers. If you first try to draw a complete and complex pop-up you’ll drive yourself crazy, but take it one step at a time and you can make almost anything. Start simple, then add layers. I cannot repeat this enough.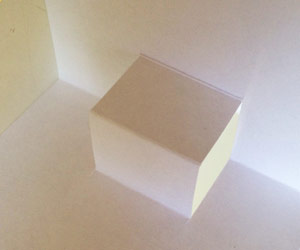
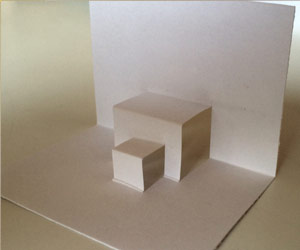
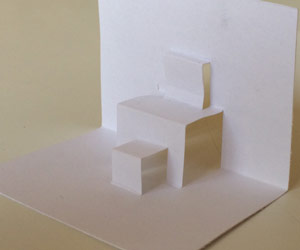
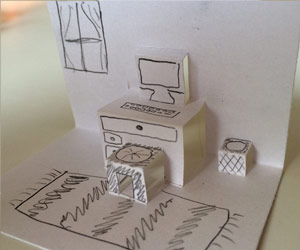
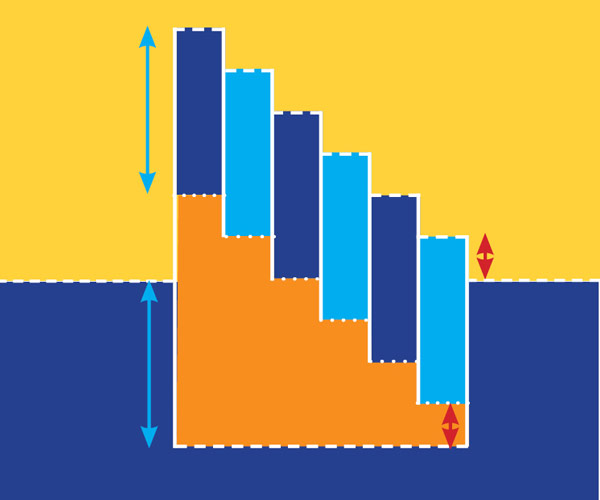
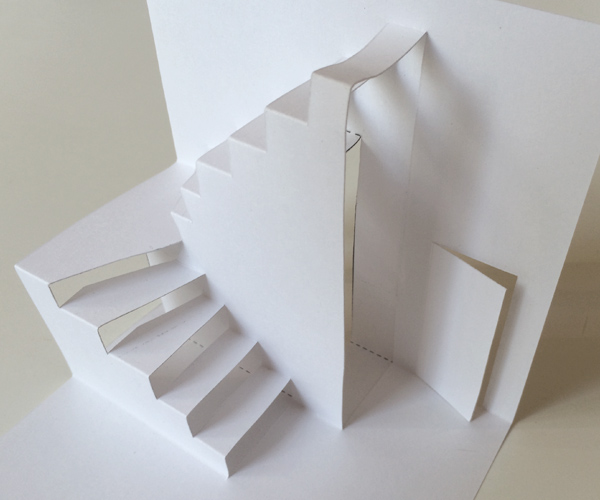
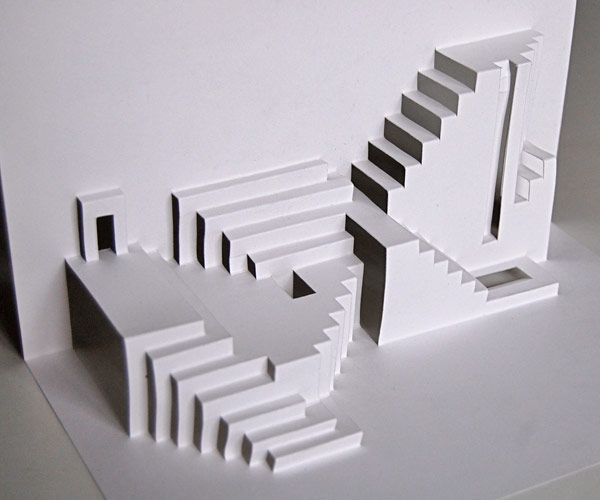
A perfect illustration of what you can achieve by starting simple, then adding layers one step at a time is (of course) the staircase. It is an irregular shape, as explained above, with one vertical plane (orange in the illustration below) and then many horizontal planes, making the steps. This slide show illustrates how you start with one fairly simple shape (stairs), then add to it to make stairs with a landing, then add graphics for extra realism, or instead keep on adding one series of steps after another to make an Eicher-like set of impossible stairs.

Wield your knife wisely
 While you’ve got your knife out you may as well make a few extra cuts: the village and Statue of Liberty pictured here have extra cut-outs which contribute to the sense of depth and space. In one of my favorite cards, the Matterhorn is just a cut-out silhouette, with only the foreground hills popping out of the page. You can also, of course, get a similar effect by drawing graphics but there’s something quite special about an image made from a single sheet of paper with no visible ink.


In some cases cutting out the extra paper will remove a distracting shape, as you can see in the stork pop-up. Without the cloud you see and recognize the shape of the beak, which gives the stork an odd shadow. Add a cloud in the sky and you only see the stork.

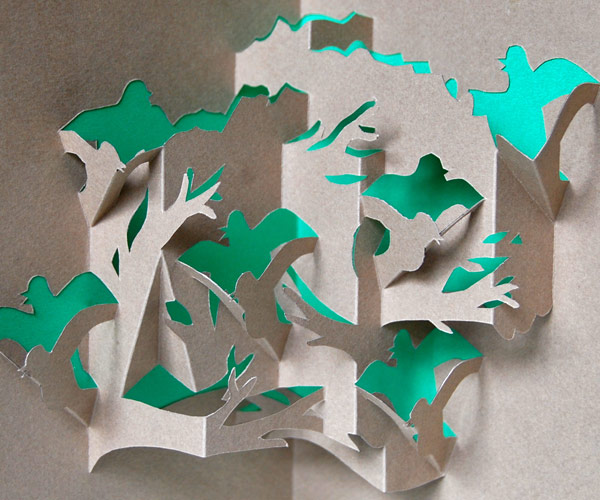
Other times you might like to use that shadow. When I wanted to create the effect of a rush of birds flying out of a tree, the shadows doubled the number of flying birds.
I just completed this very interesting commission, a pop-up of Citifield in Queens, NY, to be used as table centerpieces for a Bar Mitzvah. Working with photographs from the web and very constructive input from the Bar Mitzvah boy and his father, we opted NOT to draw the long line of hungry fans outside the Shake Shack restaurant, but I did manage to include plenty of details, including the fence on the back of the field.

This design won’t be available to the public for a while, but I have to share these photos because the project turned out so nicely. It’s a big change from the usual single sheet of paper I like to work with, but my minimalist instincts were useful to keep it from becoming too “busy.”
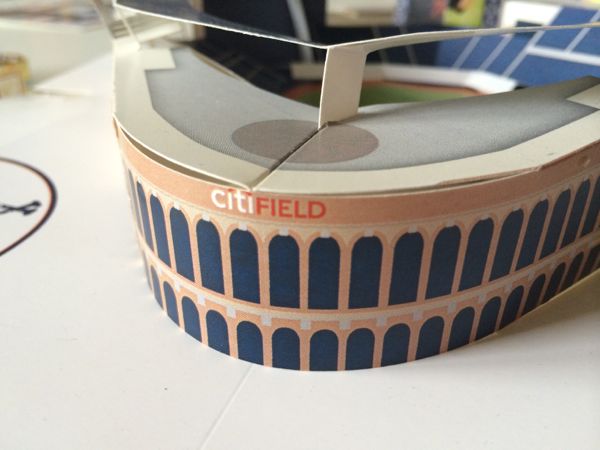
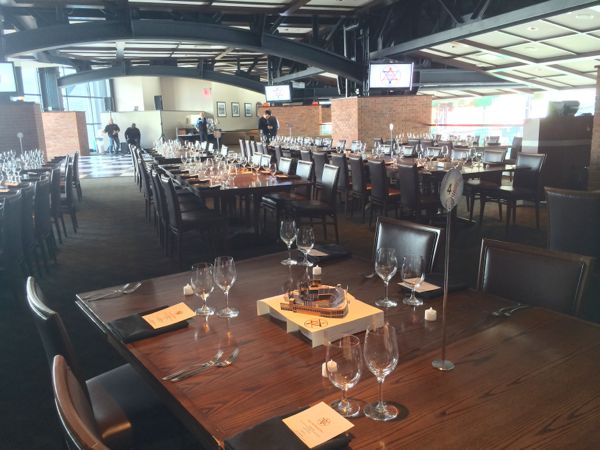
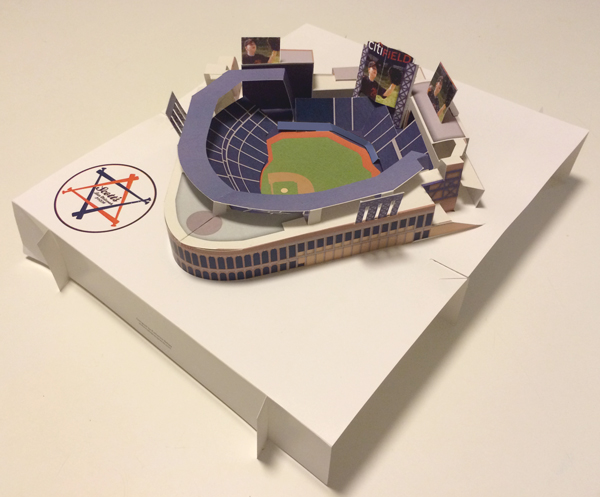
This was my final draft; all that’s missing are the foul lines and bases. The entire pop-up was raised 2″ with a few (removable) strips of paper which also held the pop-up nice and flat.
I’d like to give a big thank you to Scott’s family for their trust, feedback and encouragement, and for pushing me out of my comfort zone to design such a challenging and fun project!
Photographs don’t do this house justice, and it’s hard to explain exactly what comes in the box and how it all comes together — but in just two minutes and thirty seconds not only will you see a close-up of the finished house, you will know exactly what’s in the box and how it’s assembled. You’ll see the concentration on a nine year old boy’s face as he carefully folds one room, oblivious to the fly resting on his hand, and listen to the happy singing of a five year old girl as she discovers the house and immediately starts playing.
Enjoy!
You must be logged in to post a comment.